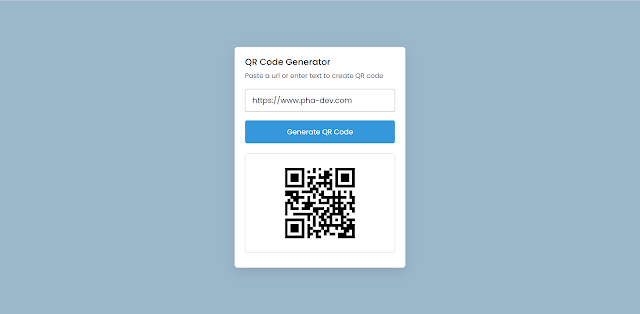
Hey Dev,
today in this blog you will learn how to create a QR Code Generator using JavaScript. I use QR Code API to Generate QR Codes. you can learn more about QR Code.
To create QR Code Generator you can follow as below simple code.
Step 1: create a file name with .html extension
<!DOCTYPE html>
<html lang="en" dir="ltr">
   <head>
      <meta charset="utf-8">
      <title>QR Code Generator in JavaScript</title>
      <link rel="stylesheet" href="styles.css">
      <meta name="viewport" content="width=device-width, initial-scale=1.0">
   </head>
   <body>
      <div class="wrapper">
         <header>
            <h1>QR Code Generator</h1>
            <p>Paste a url or enter text to create QR code</p>
         </header>
         <div class="form">
            <input type="text" spellcheck="false" placeholder="Enter text or
               url">
            <button>Generate QR Code</button>
         </div>
         <div class="qr-code">
            <img src="" alt="qr-code">
         </div>
      </div>

      <script src="script.js"></script>

   </body>
</html>
Step 2: create a file name with .css extension to design beautiful layout.
/* Import Google Font - Poppins */
@import url('https://fonts.googleapis.com/css2?family=Poppins:wght@400;500;600;700&display=swap');

* {
    margin: 0;
    padding: 0;
    box-sizing: border-box;
    font-family: 'Poppins', sans-serif;
}

body {
    display: flex;
    padding: 0 10px;
    min-height: 100vh;
    align-items: center;
    background: #9bb8cb;
    justify-content: center;
}

.wrapper {
    height: 265px;
    max-width: 410px;
    background: #fff;
    border-radius: 7px;
    padding: 20px 25px 0;
    transition: height 0.2s ease;
    box-shadow: 0 10px 30px rgba(0, 0, 0, 0.1);
}

.wrapper.active {
    height: 530px;
}

header h1 {
    font-size: 21px;
    font-weight: 500;
}

header p {
    margin-top: 5px;
    color: #575757;
    font-size: 16px;
}

.wrapper .form {
    margin: 20px 0 25px;
}

.form :where(input, button) {
    width: 100%;
    height: 55px;
    border: none;
    outline: none;
    border-radius: 5px;
    transition: 0.1s ease;
}

.form input {
    font-size: 18px;
    padding: 0 17px;
    border: 1px solid #999;
}

.form input:focus {
    box-shadow: 0 3px 6px rgba(0, 0, 0, 0.13);
}

.form input::placeholder {
    color: #999;
}

.form button {
    color: #fff;
    cursor: pointer;
    margin-top: 20px;
    font-size: 17px;
    background: #3498DB;
}

.qr-code {
    opacity: 0;
    display: flex;
    padding: 33px 0;
    border-radius: 5px;
    align-items: center;
    pointer-events: none;
    justify-content: center;
    border: 1px solid #ccc;
}

.wrapper.active .qr-code {
    opacity: 1;
    pointer-events: auto;
    transition: opacity 0.5s 0.05s ease;
}

.qr-code img {
    width: 170px;
}

@media (max-width: 430px) {
    .wrapper {
        height: 255px;
        padding: 16px 20px;
    }

    .wrapper.active {
        height: 510px;
    }

    header p {
        color: #696969;
    }

    .form :where(input, button) {
        height: 52px;
    }

    .qr-code img {
        width: 160px;
    }
}
Step 3: create a file name with .js extension.
const wrapper = document.querySelector(".wrapper"),
    qrInput = wrapper.querySelector(".form input"),
    generateBtn = wrapper.querySelector(".form button"),
    qrImg = wrapper.querySelector(".qr-code img");
let preValue;

generateBtn.addEventListener("click", () => {
    let qrValue = qrInput.value.trim();
    if (!qrValue || preValue === qrValue) return;
    preValue = qrValue;
    generateBtn.innerText = "Generating QR Code...";
    qrImg.src = `https://api.qrserver.com/v1/create-qr-code/?size=200x200&data=${qrValue}`;
    qrImg.addEventListener("load", () => {
        wrapper.classList.add("active");
        generateBtn.innerText = "Generate QR Code";
    });
});

qrInput.addEventListener("keyup", () => {
    if (!qrInput.value.trim()) {
        wrapper.classList.remove("active");
        preValue = "";
    }
});
I hope it help you. follow us for more content or tips to share with you.

